Before we start…
The previous post about dockerising a PHP application (which you should read if you haven’t) got a lot more attention than I ever imagined, which is AWESOME. However, while introducing some of the suggested improvements a number discrepencies between the contents of the blog post and the GitHub repository emerged. Buuut…
The death of php-docker.local
The initial setup included a step that required you to update your hosts file and add an entry for php-docker.local. I received feedback from several people that this step is not completely clear and they ended up skipping it. It turns out this step can be removed easily, so why don’t we just go ahead and do it :)
Two things are needed to achieve this. First, we have to update the site.conf in order to handle the connections to localhost. Second, the default configuration in the Nginx image should be replaced with our new config.
For the first part we have to replace the server_name setting with:
server_name localhost;and add the following setting:
listen 80;Now our site.conf will look like this:
server {
    listen 80;
    index index.php index.html;
    server_name localhost;
    error_log  /var/log/nginx/error.log;
    access_log /var/log/nginx/access.log;
    root /code;

    location ~ \.php$ {
        try_files $uri =404;
        fastcgi_split_path_info ^(.+\.php)(/.+)$;
        fastcgi_pass php:9000;
        fastcgi_index index.php;
        include fastcgi_params;
        fastcgi_param SCRIPT_FILENAME $document_root$fastcgi_script_name;
        fastcgi_param PATH_INFO $fastcgi_path_info;
    }
}
In order to replace the default Nginx config we have to mount our site.conf in its place. To achieve that we have to tweak our docker-compose.yml a bit. The end result will look like this:
web:
    image: nginx:latest
    ports:
        - "8080:80"
    volumes:
        - ./code:/code
        - ./site.conf:/etc/nginx/conf.d/default.conf
    links:
        - php
php:
    image: php:7-fpm
    volumes:
        - ./code:/code
For those who missed it, we changed one of the volumes for the web container with the following:
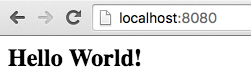
- ./site.conf:/etc/nginx/conf.d/default.confNow your PHP application will be accessible on any domain pointing to your Docker host.
Docker-compose v2
For a while now docker-compose supports version 2 for the docker-compose files, which adds some improvements to the setup. Let’s see how the docker-compose.yml will look like using the new format:
version: 2

services:
    web:
        image: nginx:latest
        ports:
            - "8080:80"
        volumes:
            - ./code:/code
            - ./site.conf:/etc/nginx/conf.d/site.conf
    php:
        image: php:7-fpm
        volumes:
            - ./code:/code
This doesn’t look much different, except that we don’t have to specify the links between the containers. Docker-compose adds all the containers to the same network and they are “linked” by default. This is especially useful when you add more containers to the setup (e.g. database, cache, queue, etc.) since you don’t have to worry about specifing the links between containers.
Another thing the we can do using version 2 of the docker-compose files is to specify networks for the containers. For example:
version: 2

services:
    web:
        image: nginx:latest
        ports:
            - "8080:80"
        volumes:
            - ./code:/code
            - ./site.conf:/etc/nginx/conf.d/default.conf
        networks:
            - code-network
    php:
        image: php:fpm
        volumes:
            - ./code:/code
        networks:
            - code-network

networks:
    code-network:
        driver: bridge
This option allows grouping different containers in different networks based on the services they need to connect to. In our setup this is not needed, but I believe it’s an important feature to be aware of, especially when expanding the setup with more services.
Special thanks to cipriantepes, who contributed to the repository with this improvement.
PHP logging to stdout
This is something trivial but I never really thought it’s needed until I got several requests and even a PR for it. The issue is that the default php-fpm Docker image is not configured to log the errors. The fix is to enable logging.
First, let’s add a log.conf file with the following content:
php_admin_flag[log_errors] = on
php_flag[display_errors] = off
Next, add this to the configuration of the PHP container:
 version: '2'

services:
    web:
        image: nginx:latest
        ports:
            - "8080:80"
        volumes:
            - ./code:/code
            - ./site.conf:/etc/nginx/conf.d/default.conf
        networks:
            - code-network
    php:
        image: php:fpm
        volumes:
            - ./code:/code
            - ./log.conf:/usr/local/etc/php-fpm.d/zz-log.conf
        networks:
            - code-network

networks:
    code-network:
        driver: bridge
So… what happened? Well, we mounted our new log file in the PHP container, but we added a zz- prefix to it. Why? Because we want to have this configuration loaded last, so that it’s not overriden by the rest of the configs.
Here’s the line for the curious:
- ./log.conf:/usr/local/etc/php-fpm.d/zz-log.conf
Since this wasn’t part of the initial blog post, it resides in a separate branch – feature/log-to-stdout.
Final summation
I guess no matter how good you make something, there’s always room for improvement. In that sense, any remarks and PRs are more than welcome :)
You can find the updated code here – https://github.com/mikechernev/dockerised-php