Before we start…
Before we start, we have to agree on one thing – Docker is super cool! If you are not familiar with Docker, I suggest to have a look at the tons of “Getting starting with Docker” or “What is Docker?” articles and then come back here. :)
Since you keep reading, I will assume that you already have some Docker experience and you want to run your PHP applications in containers. Because who wants the trouble of installing all the dependencies on their local environment or manage a number of virtual machines for their different projects, right? Right!
The goal that we will try to achieve is to run a simple PHP application using the official Docker repositories for both PHP and Nginx. There are several docker repositories combining PHP-FPM with Nginx, but depending on the official repositories gives you several benefits, like using a service which is configured by its maintainers and you can always choose between the latest and greatest or different versions of both services, instead of relying on someone else’s choices.
The first thing you have to do is, of course, install Docker (if you haven’t already). The second prerequisite is getting Docker Compose (it is included in the Mac toolbox). Now that we know what we want to achieve and have the tools to accomplish it – let’s get our hands dirty!
Setting up Nginx
We’ll start by getting ourselves a web server and based on our requirements this will be a container running the official Nginx image. Since we’ll be using Docker Compose, we will create the following docker-compose.yml file, which will run the latest Nginx image and will expose its port 80 to port 8080:
web:
 image: nginx:latest
 ports:
 - "8080:80"
Now we can run
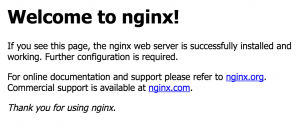
docker-compose upThis should give you the default Nginx screen on port 8080 for localhost or the IP of your docker machine.
Now that we have a server let’s add some code. First we have to update the docker-compose.yml to mount a local directory. I will use a folder called code, which is in the same directory as my docker-compose.yml file, and it will be mounted as root folder code in the container.
web:
    image: nginx:latest
    ports:
        - "8080:80"
    volumes:
        - ./code:/code
The next step is to let Nginx know that this folder exists.
Let’s create the following site.conf on the same level as the docker-compose.yml file:
server {
    index index.html;
    server_name php-docker.local;
    error_log  /var/log/nginx/error.log;
    access_log /var/log/nginx/access.log;
    root /code;
}
If you don’t have a lot of experience with Nginx, this is what we define here – index.html will be our default index, the server name is php-docker.local and it should be pointing (update your hosts file) to your Docker environment (localhost if you are on Linux or the docker machine if you are on Mac or Windows), we point the error logs to be the ones exposed by the default container, so that we will see the errors in our docker compose log, and finally we specify the root folder to be the one that we mounted in the container.
To activate this setup we need to apply yet another modification to our docker-compose.yml file:
web:
    image: nginx:latest
    ports:
        - "8080:80"
    volumes:
        - ./code:/code
        - ./site.conf:/etc/nginx/conf.d/site.conf
This will add site.conf to the directory where Nginx is looking for configuration files to include. You can now place an index.html file in the code folder with contents that is to your heart’s delight. And if we run
docker-compose upagain, the index.html file should be available on php-docker.local:8080.
Yeey! We are half way there
Adding PHP-FPM
Now that we have Nginx up and running let’s add the PHP in the game. The first thing we’ll do is pull the official PHP7-FPM repo and link it to our Nginx container. Our docker-compose.yml will look like this now:
web:
    image: nginx:latest
    ports:
        - "8080:80"
    volumes:
        - ./code:/code
        - ./site.conf:/etc/nginx/conf.d/site.conf
    links:
        - php
php:
    image: php:7-fpm
The next thing to do is configure Nginx to use the PHP-FPM container for interpreting PHP files. Your updated site.conf should look like this:
server {
    index index.php index.html;
    server_name php-docker.local;
    error_log  /var/log/nginx/error.log;
    access_log /var/log/nginx/access.log;
    root /code;

    location ~ \.php$ {
        try_files $uri =404;
        fastcgi_split_path_info ^(.+\.php)(/.+)$;
        fastcgi_pass php:9000;
        fastcgi_index index.php;
        include fastcgi_params;
        fastcgi_param SCRIPT_FILENAME $document_root$fastcgi_script_name;
        fastcgi_param PATH_INFO $fastcgi_path_info;
    }
}
In order to test this let’s rename the index.html file to index.php and replace its content with the standard:
<?php
echo phpinfo();
One final
docker-compose upAnd we should be good to go... but
Instead of getting the proper PHP info page we receive the rather unsettling
File not found.Since PHP is running in its own environment (container) it doesn't have access to the code. In order to fix this, we need to mount the code folder in the PHP container too. This way Nginx will be able to serve any static files, and PHP will be able to find the files it has to interpret. One final change to the docker-compose.yml:
web:
    image: nginx:latest
    ports:
        - "8080:80"
    volumes:
        - ./code:/code
        - ./site.conf:/etc/nginx/conf.d/site.conf
    links:
        - php
php:
    image: php:7-fpm
    volumes:
        - ./code:/code
Finally, this last (this time for real)
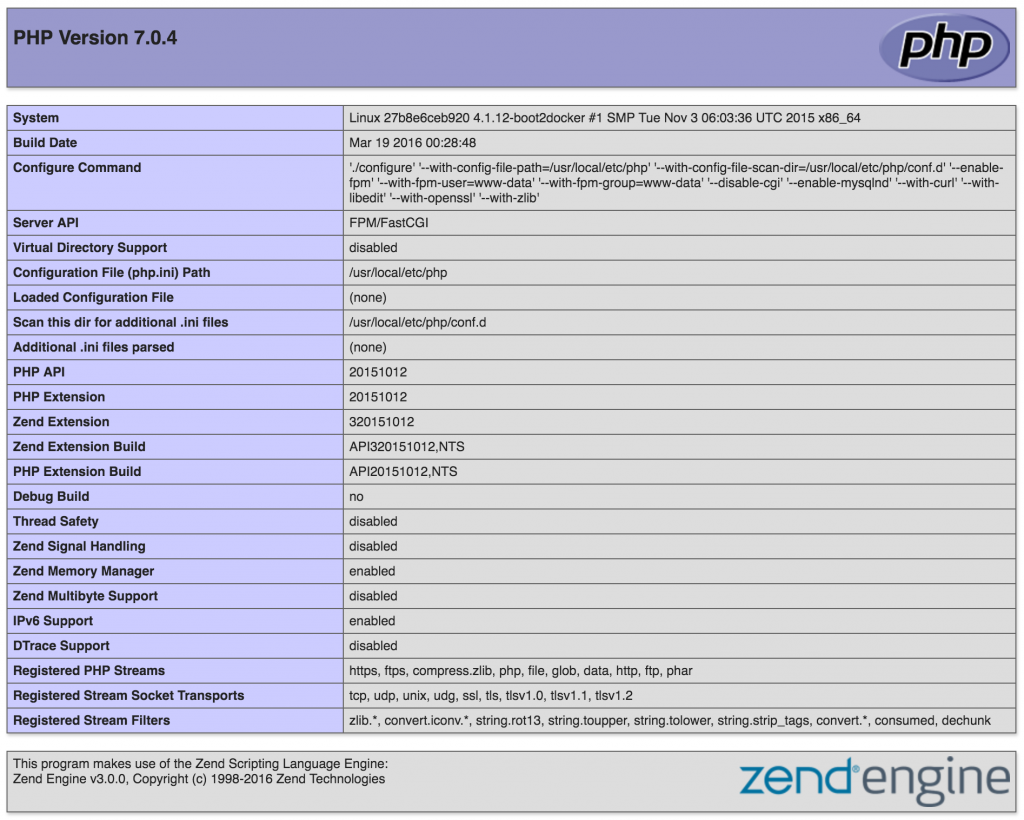
docker-compose uppresent us with the much wanted PHP info

This is it.
We can run any simple PHP application inside Docker containers, using the official images for Nginx and PHP.
You can find the sample project here https://github.com/mikechernev/dockerised-php
EDIT: Since the GitHub repository changed quite a lot, I added a new blog post explaining the improvements - Making your dockerised PHP application even better

You might want to edit the first docker-composer up.
The basic docker-compose yml you’ve created – if you run docker-compose up on it, the terminal will then be attempting to start the container but waiting for print logs to be setup. There aren’t any, so the terminal just sits waiting.
maybe change that first command to docker-compose up -d to bring it back?
I agree to this suggestion. Changing the first `docker-compose up` to `docker-compose up -d` will help to reduce confusion for new people.
(localhost if you are on Linux or the docker machine if you are on Mac or Windows)
Also this comment – like probably a lot of readers I am coming here looking to setup my first docker environment (I’m on MacOS). I’ve realised that ‘the docker machine’ involves a considerable about of docker knowledge prior to this, so it’s currently not working and I need to find out how docker -actually- works when it comes to IP/localhost routing
This is exactly what I needed. Thanks for an article. I have only one more thing to solve, as I want to host api and frontend on different hosts, so how do I solve two vhosts/hosts configuration on one nginx?
site.conf:/etc/nginx/conf.d/site.conf
is no longer working as
site.conf:/etc/nginx/conf.d/default.conf
already definded a root.
on a mac. this is NOT working for me. I just keep getting the nginx welcome page.
it simply will NOT ROUTE TO THE FOLDER WITH MY FILES. DOENS’T MATTER WAHT I CHANGE THE FOLDER NAMES TO.
im forced to give up on docker. it just simply doesn’t work whenever you have something custom.
Make sure you’re testing against the host “php-docker.local”, and have added an entry for this in your hosts file. It sounds like you might be hitting the default nginx conf by browsing to “localhost:8080”.
Hello,
the problem is the default nginx config is still present within the container you’re spinning up and effectively overwrite the config you supply, because it loads first.
To fix the go into the docker-compose.yml file you have created and change the configuration link line from:
– ./site.conf:/etc/nginx/conf.d/site.conf
to
– ./site.conf:/etc/nginx/conf.d/000_site.conf
The 000_ prefix is just an example, it is there so that your config loads first. This fixes the problem on my MacBook. :)
That works perfectly! Thanks a million!!!
I’m using Linux Mint and I had the same problem.
it works for me too, thanks.
Why it doesn’t work with site.conf?
really simple, efficient and easily understandable.
thank you for this tutorial :)
How do you deploy this kind of application with Google Cloud Console?
Thanks a lot for the tutorial!
This is broken. It works up to the point where you add the php to the nginx. Then the php runs and kills the nginx. the error is that there is no upstream defined here for php:
For future reference I suggest you put an alert at the TOP of the page pointing to the newer version of this post rather than way down at the BOTTOM. Then your readers will follow that link before they build a broken app and think you are another ahole with a broken tutorial.
Hey there,
we are currently experimenting with docker and I want to use your setup with typo3.
But when I want to install typo3 I get a warning about openssl being not configured the right way. The php-fpm image has openssl, so I don’t get where this error is coming from.
Do you have any idea where this how this error could occur?
Found this after trying to get my head around Docker for 2 days!
Great tutorial
if by any chance you face the error : “nginx: [emerg] host not found in upstream …” add below option under web service in docker-compose :
depends_on:
– php
This is not work
i fee like i am so close! the index index.html file registers for my page to work correctly in php-docker.local, but how do we register an index.php to also work correctly with this tutorial?
I tried to simply create index.php with php code. But when I run it from the browser, it wants to download the page.
Anyone got any ideas?
Got it! Golden all the way through! Many thanks for this tutorial.
And what about production? I usually put the `code` folder inside the image that is built, so should I have to create 2 images (one for nginx, the other for php-fpm) that contain both of them the `code` folder in it?
Hey man you saved my life. I’ve never split PHP and Nginx to deploy applications, so I don’t know the necessity for mount code to both containers. Thank you
This article, along with at least three sage commenters, have all remarked that you “need to update your hosts file,” but no one bothers to say HOW. Can someone please post a simple example of an entry one should add to their hosts file to point to the Docker machine?
@Gordon Myers
You need to open your hosts file in your text editor if choice. If you’re on macOS, the file you’re looking for is `/etc/hosts`, which you can edit with, for example: `sudo nano /etc/hosts`.
You then just need to add a line containing this:
127.0.0.1 php-docker.local
Save the modified file, and you should be able to access http://php-docker.local:8080/ in your web browser.
Not working or me. It would be better to use a specific version instead of nginx:latest so that this tutorial also works next year.
Thank you, very nice , just reading, doing what you say and it works !
Thank you mate, that was very helpful. You got my going.
Hi guys,
I’m having the issue that -no matter what I do- I’m getting a ‘403 Forbidden’ error whenever I try to get to a .php file.
Whenever I change it back to an HTML file, it works fine.
Any suggestions?
R.I.P. me, I didn’t see the ‘index.php’ inside the nginx config file…
So easy fix.
Ignore the above comment =).