Before we start…
Before we start, we have to agree on one thing – Docker is super cool! If you are not familiar with Docker, I suggest to have a look at the tons of “Getting starting with Docker” or “What is Docker?” articles and then come back here. :)
Since you keep reading, I will assume that you already have some Docker experience and you want to run your PHP applications in containers. Because who wants the trouble of installing all the dependencies on their local environment or manage a number of virtual machines for their different projects, right? Right!
The goal that we will try to achieve is to run a simple PHP application using the official Docker repositories for both PHP and Nginx. There are several docker repositories combining PHP-FPM with Nginx, but depending on the official repositories gives you several benefits, like using a service which is configured by its maintainers and you can always choose between the latest and greatest or different versions of both services, instead of relying on someone else’s choices.
The first thing you have to do is, of course, install Docker (if you haven’t already). The second prerequisite is getting Docker Compose (it is included in the Mac toolbox). Now that we know what we want to achieve and have the tools to accomplish it – let’s get our hands dirty!
Setting up Nginx
We’ll start by getting ourselves a web server and based on our requirements this will be a container running the official Nginx image. Since we’ll be using Docker Compose, we will create the following docker-compose.yml file, which will run the latest Nginx image and will expose its port 80 to port 8080:
web:
 image: nginx:latest
 ports:
 - "8080:80"
Now we can run
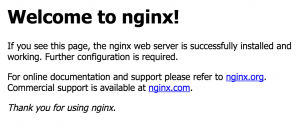
docker-compose upThis should give you the default Nginx screen on port 8080 for localhost or the IP of your docker machine.
Now that we have a server let’s add some code. First we have to update the docker-compose.yml to mount a local directory. I will use a folder called code, which is in the same directory as my docker-compose.yml file, and it will be mounted as root folder code in the container.
web:
    image: nginx:latest
    ports:
        - "8080:80"
    volumes:
        - ./code:/code
The next step is to let Nginx know that this folder exists.
Let’s create the following site.conf on the same level as the docker-compose.yml file:
server {
    index index.html;
    server_name php-docker.local;
    error_log  /var/log/nginx/error.log;
    access_log /var/log/nginx/access.log;
    root /code;
}
If you don’t have a lot of experience with Nginx, this is what we define here – index.html will be our default index, the server name is php-docker.local and it should be pointing (update your hosts file) to your Docker environment (localhost if you are on Linux or the docker machine if you are on Mac or Windows), we point the error logs to be the ones exposed by the default container, so that we will see the errors in our docker compose log, and finally we specify the root folder to be the one that we mounted in the container.
To activate this setup we need to apply yet another modification to our docker-compose.yml file:
web:
    image: nginx:latest
    ports:
        - "8080:80"
    volumes:
        - ./code:/code
        - ./site.conf:/etc/nginx/conf.d/site.conf
This will add site.conf to the directory where Nginx is looking for configuration files to include. You can now place an index.html file in the code folder with contents that is to your heart’s delight. And if we run
docker-compose upagain, the index.html file should be available on php-docker.local:8080.
Yeey! We are half way there
Adding PHP-FPM
Now that we have Nginx up and running let’s add the PHP in the game. The first thing we’ll do is pull the official PHP7-FPM repo and link it to our Nginx container. Our docker-compose.yml will look like this now:
web:
    image: nginx:latest
    ports:
        - "8080:80"
    volumes:
        - ./code:/code
        - ./site.conf:/etc/nginx/conf.d/site.conf
    links:
        - php
php:
    image: php:7-fpm
The next thing to do is configure Nginx to use the PHP-FPM container for interpreting PHP files. Your updated site.conf should look like this:
server {
    index index.php index.html;
    server_name php-docker.local;
    error_log  /var/log/nginx/error.log;
    access_log /var/log/nginx/access.log;
    root /code;

    location ~ \.php$ {
        try_files $uri =404;
        fastcgi_split_path_info ^(.+\.php)(/.+)$;
        fastcgi_pass php:9000;
        fastcgi_index index.php;
        include fastcgi_params;
        fastcgi_param SCRIPT_FILENAME $document_root$fastcgi_script_name;
        fastcgi_param PATH_INFO $fastcgi_path_info;
    }
}
In order to test this let’s rename the index.html file to index.php and replace its content with the standard:
<?php
echo phpinfo();
One final
docker-compose upAnd we should be good to go... but
Instead of getting the proper PHP info page we receive the rather unsettling
File not found.Since PHP is running in its own environment (container) it doesn't have access to the code. In order to fix this, we need to mount the code folder in the PHP container too. This way Nginx will be able to serve any static files, and PHP will be able to find the files it has to interpret. One final change to the docker-compose.yml:
web:
    image: nginx:latest
    ports:
        - "8080:80"
    volumes:
        - ./code:/code
        - ./site.conf:/etc/nginx/conf.d/site.conf
    links:
        - php
php:
    image: php:7-fpm
    volumes:
        - ./code:/code
Finally, this last (this time for real)
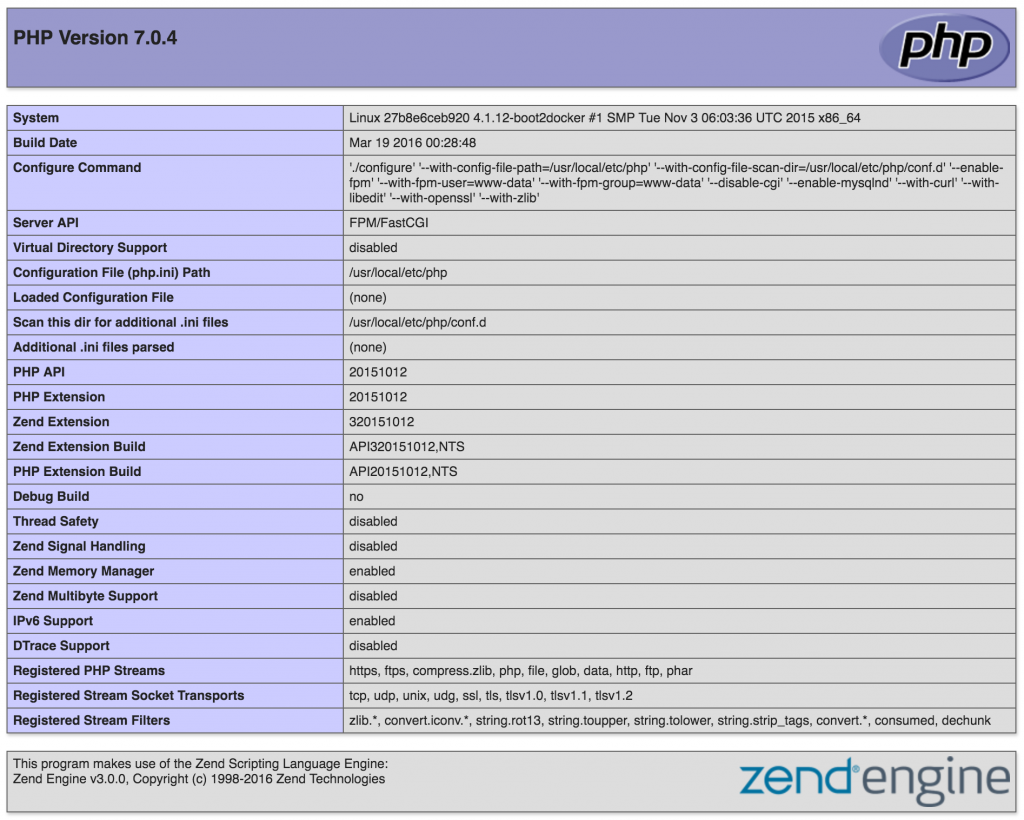
docker-compose uppresent us with the much wanted PHP info

This is it.
We can run any simple PHP application inside Docker containers, using the official images for Nginx and PHP.
You can find the sample project here https://github.com/mikechernev/dockerised-php
EDIT: Since the GitHub repository changed quite a lot, I added a new blog post explaining the improvements - Making your dockerised PHP application even better

Dude, works like a charm and now i understand a lot of thing
Just 1 thing, on the site.conf you should add the index directive in order to access the index.php without type explicitly on the browser
Besides that, excellent tutorial!
It seems that on the first part, “site.conf” doesn’t work and had to replace it with “default.conf”
thank you so much!
thanks, this helped me as well
True hero here. How can others say “worked perfectly”?
I believe the issue is the SERVER php-docker.local (which means the http://php-docker.local/ needs to be part of the URL. If it is ANY server (such as localhost, etc). then you would need to change the defaults.conf as suggested.
Here is the relevant part of the instructions from above:
”
If you don’t have a lot of experience with Nginx, this is what we define here – index.html will be our default index, the server name is php-docker.local and it should be pointing (update your hosts file) to your Docker environment (localhost if you are on Linux or the docker machine if you are on Mac or Windows), we point the error logs to be the ones exposed by the default container, so that we will see the errors in our docker compose log, and finally we specify the root folder to be the one that we mounted in the container.
”
The alternative is to make changes to the nginx.conf which is supplies by the normal install.
actually it was suggested to add php-docker.local to your machine’s hosts file
for example in mac and Linux add this to the end of /etc/hosts file
127.0.0.1 php-docker.local
This was a great tutorial, it simply worked and your explanations said exactly what I needed to hear. Not new to docker, but because I haven’t set up a new system in two years I could not remember all of the initial steps .
this is not supported by the version 3 right ?
nice bolg thanks for share…………
nice article
Hey thanks for this, worked perfectly. Im encountering one problem though, when i try to issue sql commands on my php script i fail with the following.
Fatal error: Call to undefined function mysqli_connect()`.
I have done what the internet said, which was alter the extension in php.ini. Ive also verified the module is in the proper folder and added in the extension path for the so file. Im still encountering this problem, im assuming since its in docker there might be something im missing.
Did you add mysql to “links” section of php (in docker-compose.yml)?
As links are a deprecated feature in docker, what would be the way to get this working without the link?
use depends_on
it does not work for me an error occurred on nginx config line. i dunno how can other says it works superb ¯\_(ツ)_/¯
Error mention like mouting directory to file vise-versa
php_1 | [15-Sep-2019 11:56:15] NOTICE: fpm is running, pid 1
php_1 | [15-Sep-2019 11:56:15] NOTICE: ready to handle connections
web_1 | 2019/09/15 11:56:15 [emerg] 1#1: host not found in upstream “php” in /etc/nginx/conf.d/site.conf:11
web_1 | nginx: [emerg] host not found in upstream “php” in /etc/nginx/conf.d/site.conf:11
code_web_1 exited with code 1
Hi there I experienced the same problem and had to recreate the compose-stack by issueing the command:
$ docker-compose up -d –force-recreate
It seemed like the internal DNS resolution form the nginx-container to the php-container did not work internally in docker daemon. IMHO…
After restart it worked.
Hi,
For see the index.html for nginx installation, on windows we need to add 127.0.0.1 php-docker.local in hosts file.
Anyway, thank a lot for your share !
Thanks, this is de best tutorial for docker. I only need change this line:
– ./site.conf:/etc/nginx/conf.d/site.conf
for this
– ./site.conf:/etc/nginx/conf.d/default.conf
Anybody know why I would be getting a 403 Forbidden error after renaming the html file to a php file?
in is true((( and I
You probably forgot to add ‘index.php’ in the config file …. the second line should be looking like that: index index.html index.php;
I wonder, it will be that the author writes these guides without testing his solutions, I spent almost an hour trying and trying again, for two lines of code. In the end I succeeded, after reading the continuation of this guide, which, however, even that is not infallible, if one claims to be didactic then it really is.
Good to note : By default, nginx image has a /etc/nginx/conf.d/default.conf file.
It already adds a localhost:80, which can conflict on site.conf (understand : not loading it).
Consider replacing default.conf with an empty file.
My docker-compose.yml file (~early 2020 syntax compliant)
version: ‘3.7’
# http://geekyplatypus.com/dockerise-your-php-application-with-nginx-and-php7-fpm/
services:
web:
image: nginx:1.17.6-alpine
networks:
– network-php
ports:
– ‘8080:80’
volumes:
# Project files, bind mount for dev
– type: bind
source: ./src
# Custom src path in container
# Nginx custom conf in HOST/config/nginx1.17.6-alpine/sites-enabled/site.conf
target: /home/www
# Remove nginx default conf (localhost:80 conflict)
– type: bind
source: ./config/nginx1.17.6-alpine/conf.d/default.conf
target: /etc/nginx/conf.d/default.conf
# Config override
# Autommatically loaded thanks to defaut nginx.conf > ‘include /etc/nginx/conf.d/*.conf;”
– type: bind
source: ./config/nginx1.17.6-alpine/conf.d/site.conf
target: /etc/nginx/conf.d/site.conf
phpfpm:
# latest when writing
image: ‘php:7.4.1-fpm’
networks:
– network-php
volumes:
# Project files, bind mount for dev
– type: bind
source: ./src
# Php-fpm à besoin d’accès au fichiers également, sinon il ne les voit pas à cause de la containerisation
target: /home/www
networks:
network-php:
Cheers, and a big thanks for the article
for me it worked like this:
version: “3”
services:
web:
image: nginx:latest
ports:
– “8080:80”
volumes:
– ./code:/code
– ./nginx/conf.d/:/etc/nginx/conf.d/
site.conf in this folder:
nginx /conf.d/
site.conf:
server {
index index.html;
error_log /var/log/nginx/error.log;
access_log /var/log/nginx/access.log;
root /code;
}
Used it to add PHP Support for my nginx reverse proxy! Worked well! Thank you!
Very Nice Blog
This doesn’t work at all, even after fixing the wrong docker-compose file format (it’s missing the compose version (“version: X”) and services (“services:”) keys).
The nginx confg does not work. I’ve just wasted over 3 hours trying to get this crap to work.
Hey man Thank, you can create other about docker and mysql